
Notice
Recent Posts
Recent Comments
Link
| 일 | 월 | 화 | 수 | 목 | 금 | 토 |
|---|---|---|---|---|---|---|
| 1 | 2 | |||||
| 3 | 4 | 5 | 6 | 7 | 8 | 9 |
| 10 | 11 | 12 | 13 | 14 | 15 | 16 |
| 17 | 18 | 19 | 20 | 21 | 22 | 23 |
| 24 | 25 | 26 | 27 | 28 | 29 | 30 |
| 31 |
Tags
- 안드로이드 adb
- 기드라
- 위니브
- 인프런 강의 추천
- 리버싱 플래그
- 간단한 깃허브 블로그
- 자바스크립트 강의
- 안드로이드 리버싱
- 드림핵 리버싱
- 더오름
- adb 옵션
- 자바스크립트
- 오블완
- 인프런 깃허브 강의
- adb
- dreamhack reversing
- 깃허브 블로그 만들기
- 강의 체험단 1기
- 잔디 심기
- 안드로이드 모바일 앱 모의해킹
- 리버싱
- 인프런 파이썬 강의
- 제주코딩베이스캠프
- 파이썬
- 제주ICT
- 깃허브 포트폴리오
- 드림핵 플래그
- 깃허브 블로그
- 웃긴 파이썬
- 티스토리챌린지
Archives
- Today
- Total
해보자고
[3분만에 만드는 깃허브 블로그] 방문자 수 세기 본문
자료 출처: https://github.com/gjbae1212/hit-counter
GitHub - gjbae1212/hit-counter: :rocket: Easy way to know how many visitors are viewing your Github, Website, Notion. :tada:
:rocket: Easy way to know how many visitors are viewing your Github, Website, Notion. :tada: - gjbae1212/hit-counter
github.com
1. counter 추가
먼저, 위에 자료로 올려 둔 깃허브에 들어가 나의 깃허브 블로그 주소의 링크를 입력하고 스타일링을 마음대로 꾸며줍니다. (저는 핑크로,,)
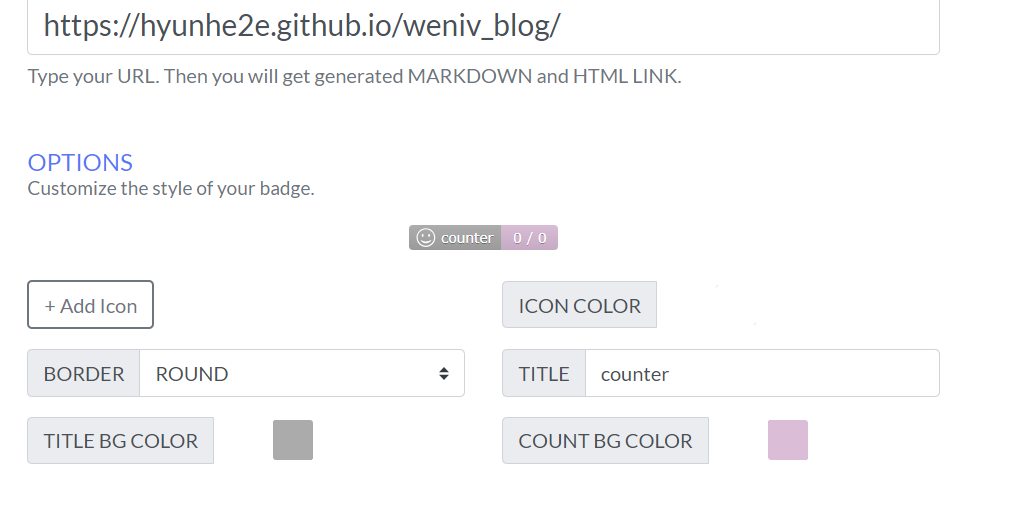
아래는 디폴트 스타일링이다.
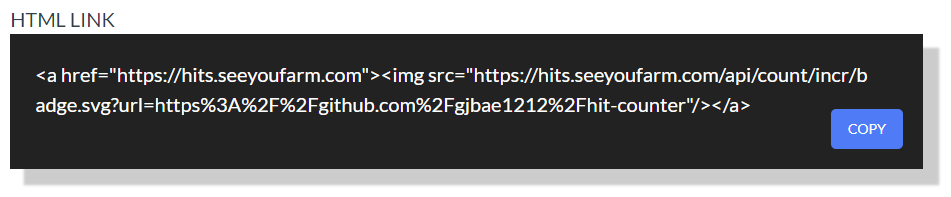
해당 카운터를 내 블로그에 추가를 해야하기 때문에 HITS 아래에 자동 생성된 html 링크를 copy하여 index.html 파일을 수정해줍니다..!
    <!-- category 검색 영역 -->
    <section
      class="category-aside hidden md:flex flex-col border border-graylv2 bg-white rounded-[10px] fixed top-24 right-8 overflow-y-auto w-fit h-fit"
    >
      <header class="flex items-center">
        <h2 class="aside-tit sr-only text-sm font-semibold ml-5">content</h2>
        <button id="aside-button">
          <span class="sr-only">카테고리 열기</span>
        </button>
      </header>
      <aside>
        <div class="px=-5 py=[y=-9]">
          <a href="https://hits.seeyoufarm.com"><img src="https://hits.seeyoufarm.com/api/count/incr/badge.svg?url=https%3A%2F%2Fhyunhe2e.github.io%2Fweniv_blog%2F&count_bg=%23E5BBDA&title_bg=%23ABABAB&icon=iconify.svg&icon_color=%23FFFFFF&title=counter&edge_flat=false"/></a>
        </div>
      </aside>
    </section>
    <!-- // category 검색 영역 -->
위치를 저는 카테고리 옆에 추가하였는데, 원한다면 다른 메뉴에 추가할 수도 있습니다.

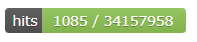
완성된 결과물을 보니 제법 귀엽네요!
'대외활동 & 교육 > 위니브 엠버서더' 카테고리의 다른 글
| [Python 부트캠프] 00. 파이썬 하수 (0) | 2025.02.23 |
|---|---|
| [견고한 기본기 HTML&CSS]HTML 골격 만들어 보기 (0) | 2025.02.12 |
| [3분만에 만드는 깃허브 블로그] 블로그 제목 및 메뉴 수정 (0) | 2025.01.31 |
| [3분만에 만드는 깃허브 블로그] 블로그 글 업로드 (0) | 2025.01.31 |
| [3분만에 만드는 깃허브 블로그] 블로그 생성 (0) | 2025.01.31 |
'대외활동 & 교육/위니브 엠버서더' Related Articles
more


